Clover
About
 | Clover POS is a cloud based point of sale system is built on Android. Launched Article Last Updated Category |
What’s Supported?
Feature | Supported | Not Supported |
|---|---|---|
Clover POS Devices |
| Clover Mini (Series 1) Clover Flex (Series 1) Clover Station (Series 1) |
Spendgo Loyalty Features |
|
|
Base Program Types |
|
|
Basket Level Rewards/Offers Types |
|
|
Item Based Rewards/Offers Types |
| |
Rewards shown for selection |
|
|
Discount code setup | No discount code setup is needed in Clover for setting up the integration. | |
Online and In-Store Ordering Platforms |
** Loyalty lookup available in the cashier facing display only.
*** Only one Spendgo reward can be applied to the order. Rewards stacking is not supported. However non Spendgo discount/coupons can be applied along with Spendgo reward.
Things to Know
Support for Voids/Refunds: This is what happens to loyalty on the order after a closed order is reopened and modified in the POS.
Action | Loyalty Processing |
|---|---|
Order is fully refunded | Loyalty on the order is revered.
|
Order is partially refunded | Partial loyalty reversal is not supported in Spendgo. Partial refund is also treated same way as the full refund. In order to keep the loyalty on the partial refund to be processed correctly, it is recommended to fully refund the order and create a new order with the updated order details. |
Order is updated | Any further loyalty update on a closed order is not supported in Spendgo. In order update the loyalty on the order, it is recommended to void the order and create a new order with the updated details. |
Loyalty processing on the order: The loyalty processing (points and rewards balance update) on the order is not in real time. The order from Clover is pulled from Clover system after the order is placed so it takes 30-45 seconds for completing the loyalty processing on the order. This means
The completed order show up in Dashboard after 30-45 seconds.
The claimed reward is not removed from the Member’s balance until 30-45 seconds after the order is completed.
The reward is validated for the order when applying, but there is a rare chance that when the order is completed, the applied reward is not valid but because this re-validation of reward cannot be done in real time, the Member will get discount but the reward balance does not get updated.
Order ID Format: All Member or guest orders placed from Clover POS usually show up an Alphanumeric ID such as XTE83HF9CPSBA.

Notes about the order receipt on Spendgo Dashboard
Please note that the receipt view of the order in Dashboard does not fully match with the customer receipt generated by Clover.
Receipt Subtotal: The Subtotal shown on the Dashboard receipt matches with the Subtotal on the Clover receipt. Clovers subtotal reflects the sum of line items and not the applied rewards/discounts/coupons.
Receipt Total: The Total shown on the Dashboard receipt matches with the Total on the Clover receipt. However, it may not tally with the other numbers (line item prices, subtotal, Tax etc.) on the receipt. Receipt total reflects the sum of line item prices including modifiers + Tax + Tip + other charges minus the applied rewards/discounts. However the dashboard receipt does not show tips and other charges.
Integration Setup
Requirements
Spendgo integration can be enabled location by location from Clover Dashboard. Access to the Clover Dashboard is required to enable the integration.
If already using Clover POS, check if any of the devices running at the location(s) are on older unsupported Clover devices. The following clover devices are not supported and will have to be upgraded to newer supported devices.
Clover Mini (Series 1)
Clover Flex (Series 1)
Clover Station (Series 1)
We recommend that if the Clover test lab is available, the integration is enabled and tested at the lab before rolling out to other locations.
How to Enable the Integration
Step 1. The Merchant confirms the location(s) is ready for setting up the integration.
Task Owner | The Merchant |
|---|---|
Required Input | The locations to enable the integrations are identified. |
Procedure | Review the requirements mentioned above and confirm the location(s) is ready for enabling Spendgo Integration |
Step 2: The Merchant Informs Spendgo CSM to initiate the integration setup
Task Owner | The Merchant |
|---|---|
Required Input | Identify the locations to enable the Spendgo Integration. |
Procedure | Inform Spendgo Customer Success Manager (CSM) (csm@spendgo.com) the list of locations that needs to be enabled. |
Data to share | List of locations to enable the integration. |
Step 3: Spendgo CSM co-ordinates integration setup activities.
Task Owner | Spendgo Customer Success Manager |
|---|---|
Required Input | Authorization from the Merchant to enable the integration |
Procedure |
|
Data to share | Share with the integration team
|
Outcome |
|
Step 4: Spendgo Integration team shares API credentials with the Merchant
Task Owner | Spendgo Integrations Team |
|---|---|
Required Input | Authorization from CSM and the Merchant contact to send the credentials to. |
Procedure | If the credentials are already not shared with the Merchant,
Refer to internal documentation for detailed instructions. |
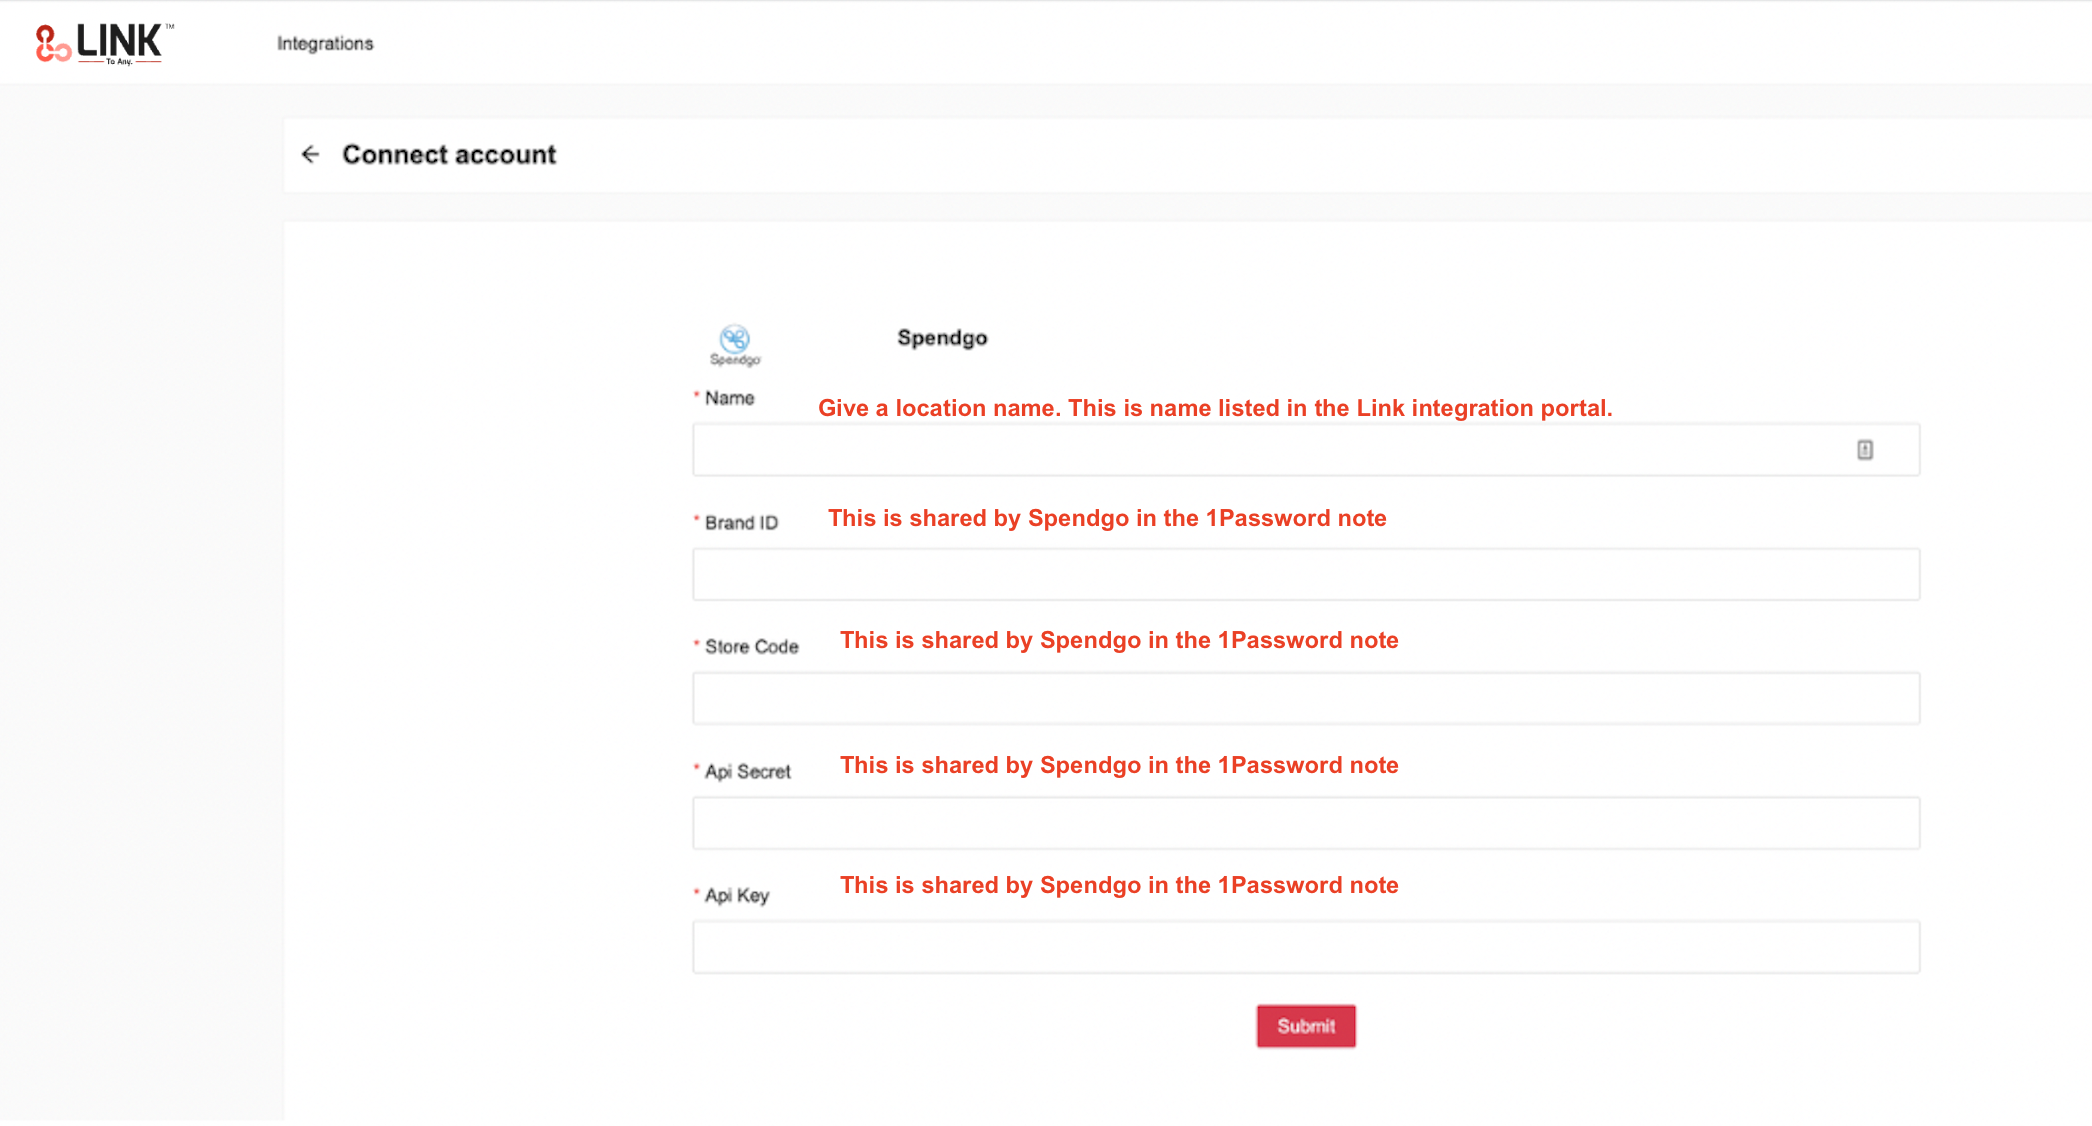
Data to share | API credentials and Brand ID and Store IDs with the Merchant in the secure 1Password note. |
Outcome | Merchant has all information needed to setup the integration. |
Step 5: The Merchant enables the integration from the Clover Dashboard
Task Owner | The Merchant |
|---|---|
Required Input | Spendgo API Credentials and other info shared by Spendgo Integrations team |
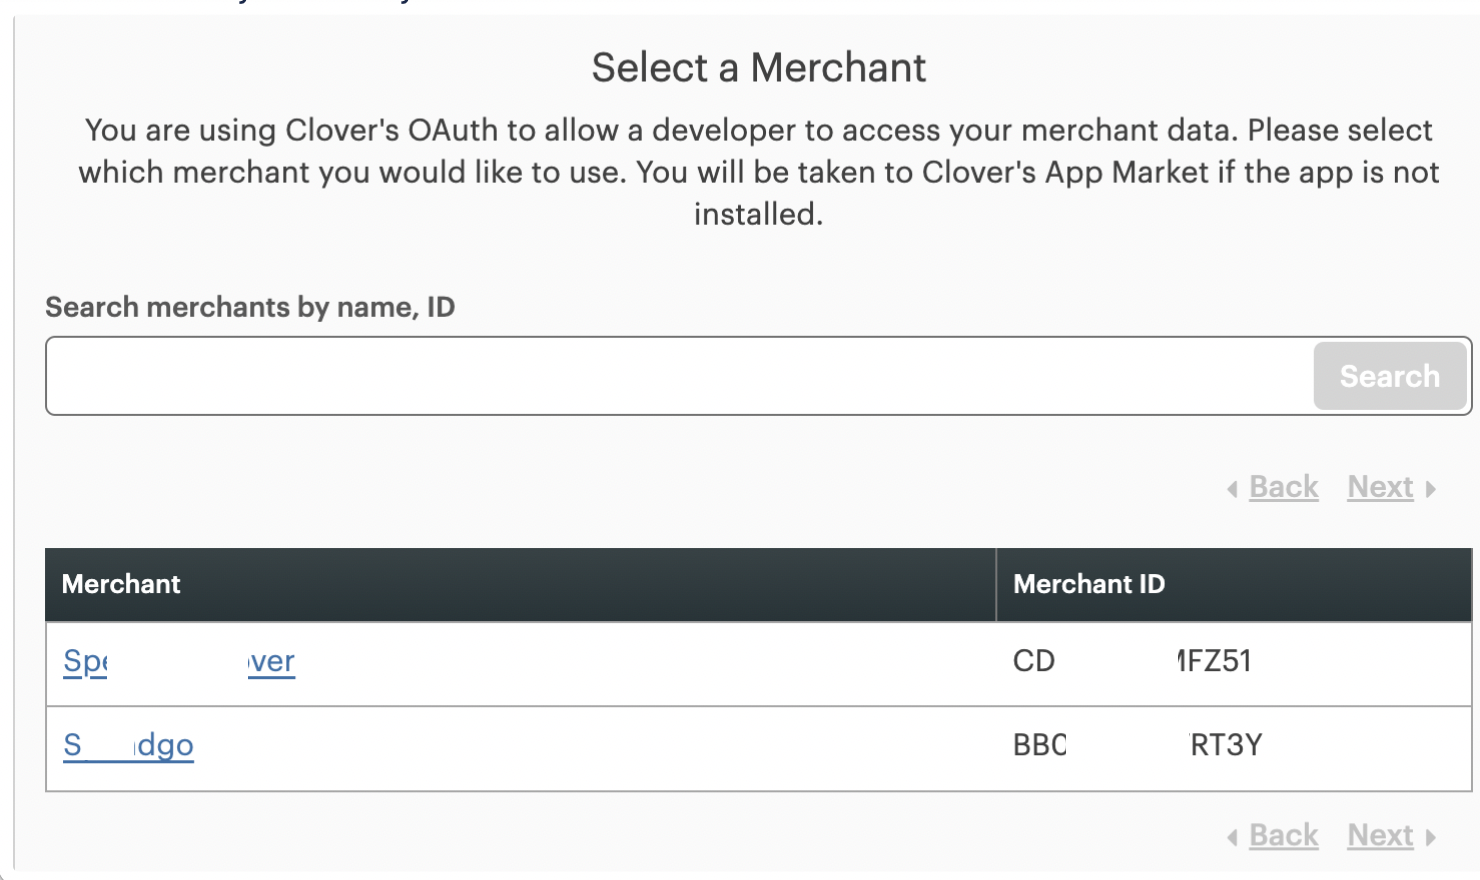
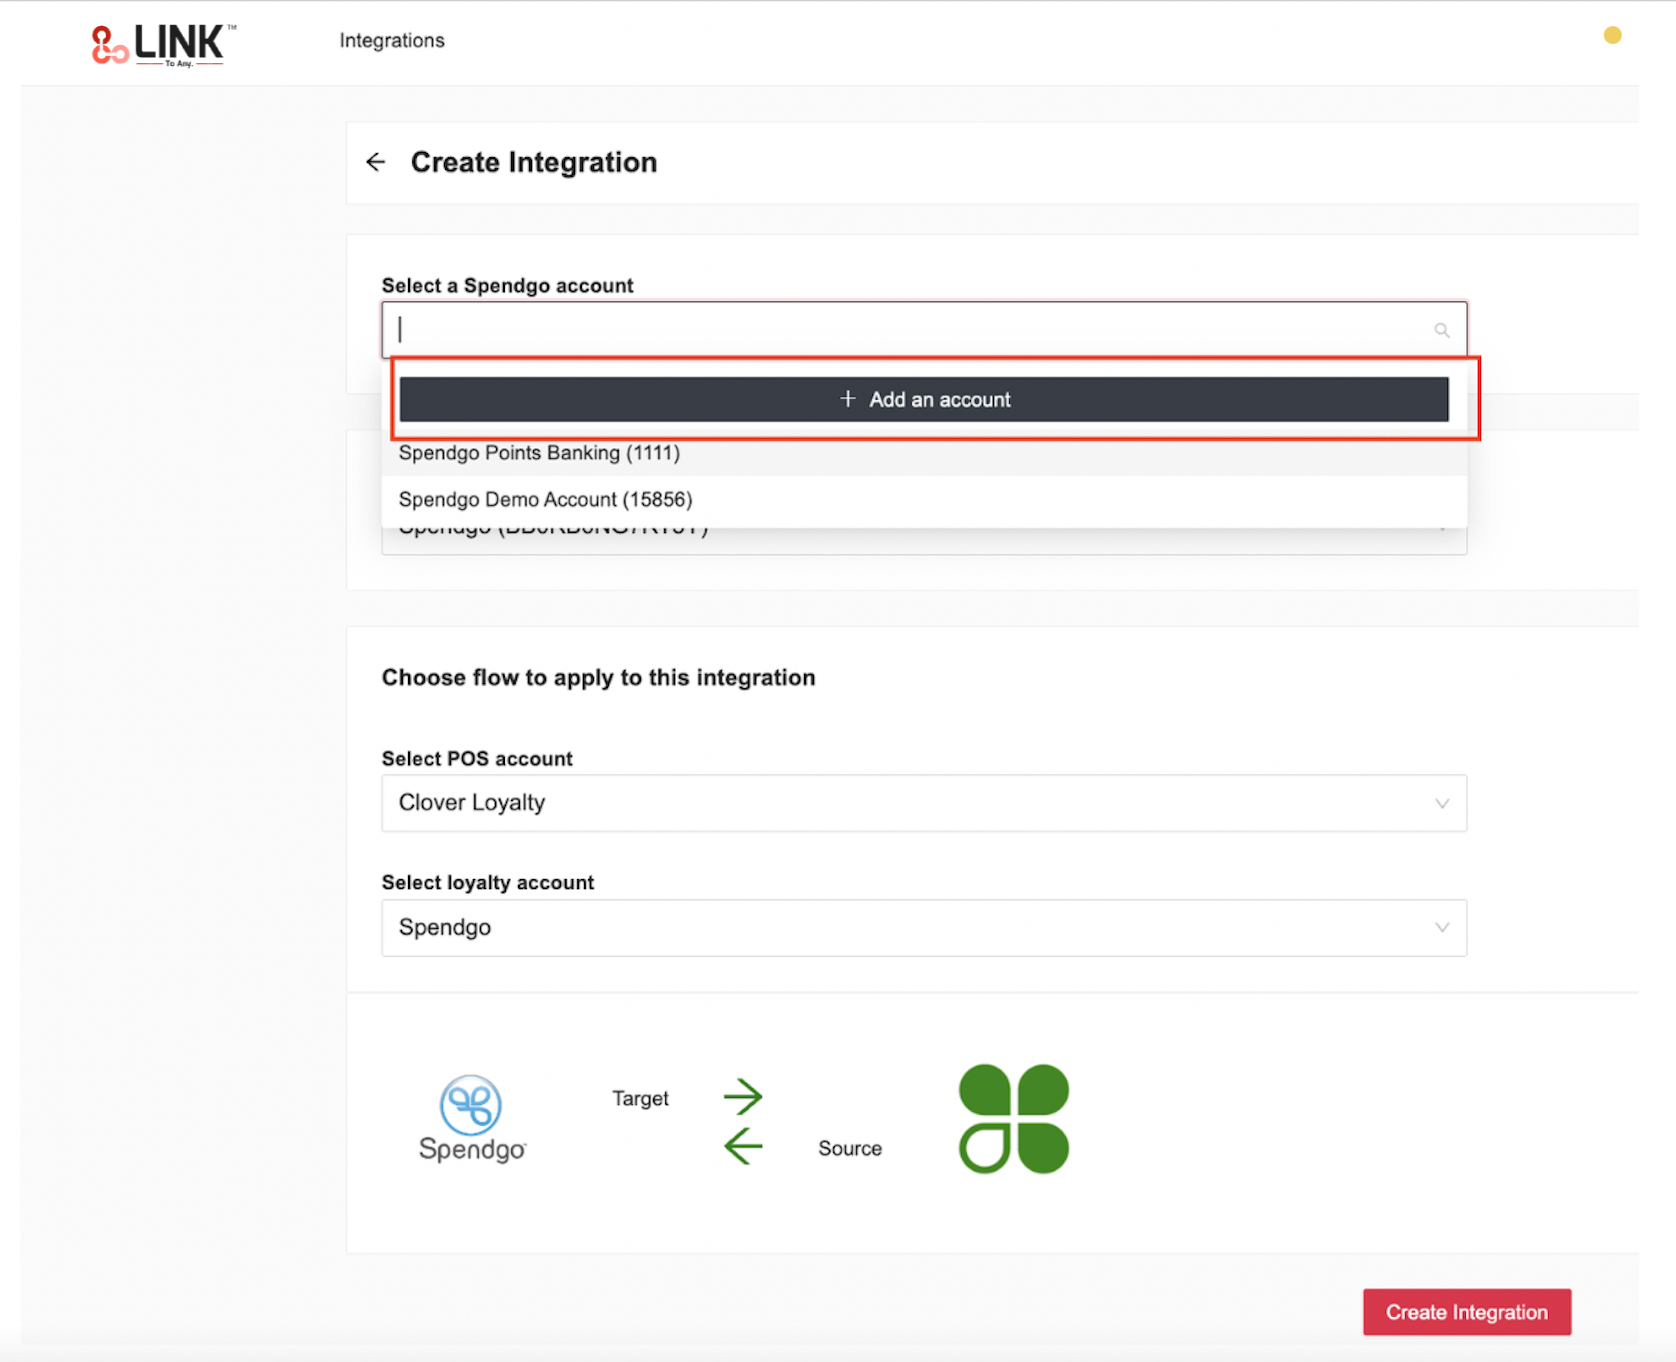
Procedure | Please note that:
For enabling the integration follow the below steps
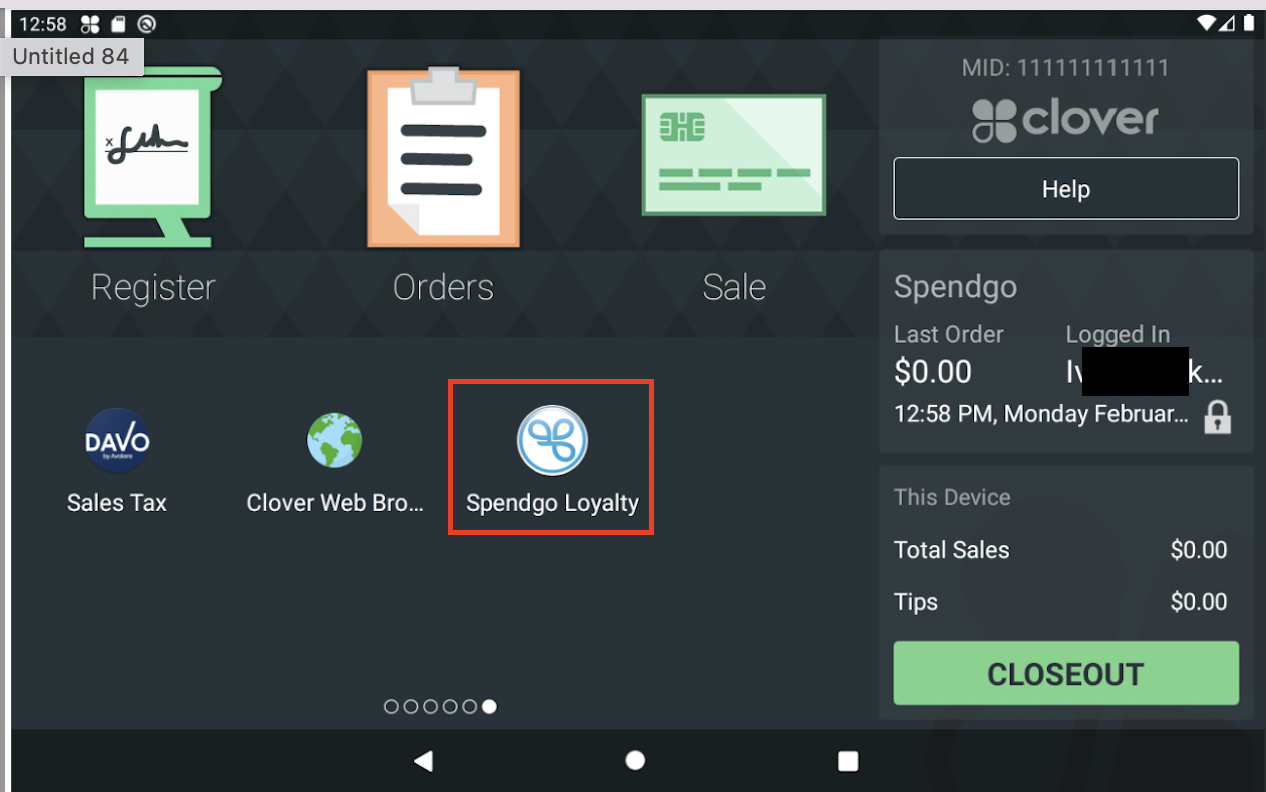
|
Outcome | The integration setup is complete on the Clover Dashboard |
Step 6: The Merchant Refreshes the POS Terminals
Task Owner | The Merchant |
|---|---|
Procedure |

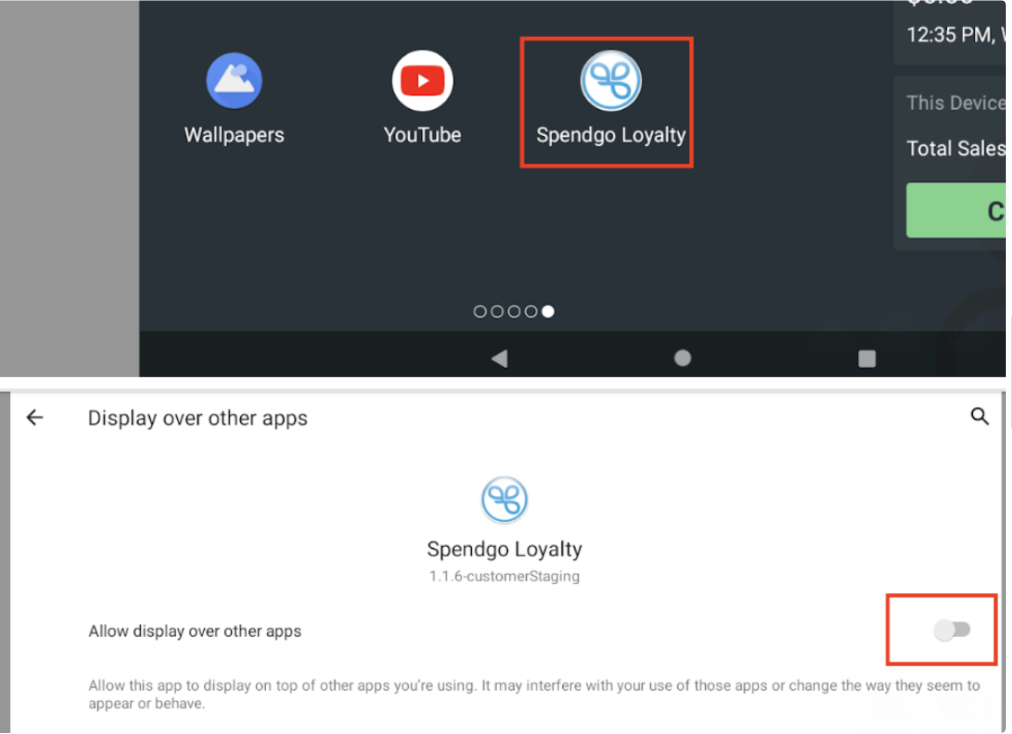 |
Outcome | The integration setup is complete |
Step 7: Verify the Integration
Task Owner | The Merchant |
|---|---|
Procedure | After setting up the integration, quickest way to check if the integration is working is to do the Loyalty Member look up. Please refer to the “Loyalty Member Lookup” in the “Loyalty Flow” section below.
|
Editing an integration
If configuration needs to be updated for any reason. Open the Shoppinpal page by following step (3) above. Since the integration is already enabled, there is no need to enter any details on the page. Click on the “Integration” link at the top of the page. Look for the location in the list and delete the integration setup integration again using the steps mentioned in the previous section.
Disabling the integration
To disable the integration the Spendgo Loyalty App needs to be uninstalled.
Login to the Clover Dashboard.
Click on “More Tools” → My Apps.
Then select the Uninstall app from the “Actions” menu next to “Spendgo Loyalty” App.
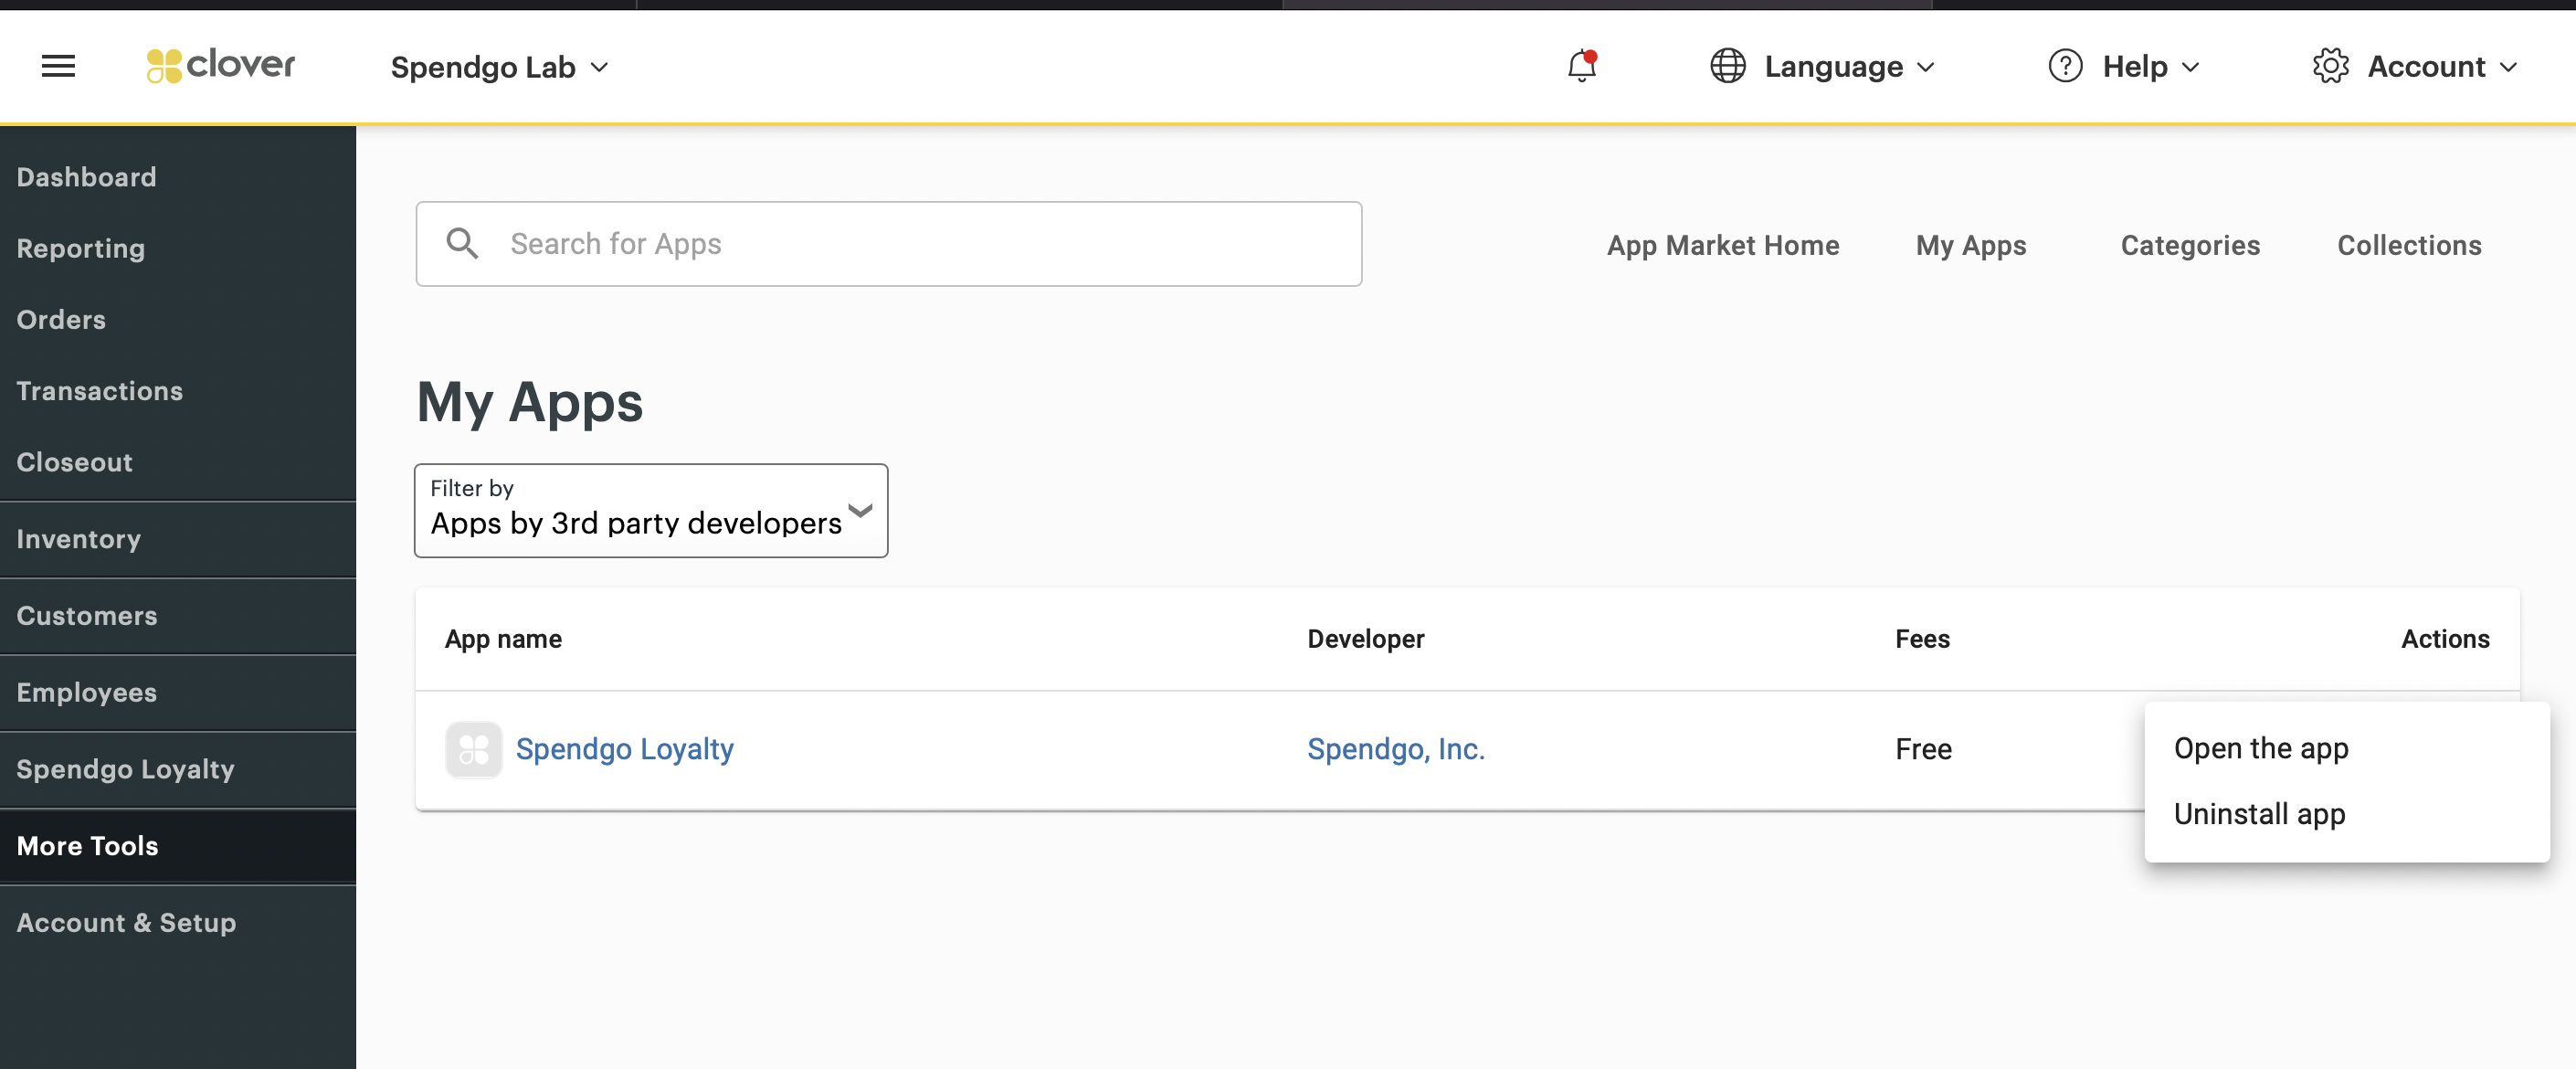
Reboot the devices or Refresh the POS from the “Register” App.
Loyalty Flow
The Spendgo loyalty integration is enabled, a “Loyalty Reward” button shows up on the payment screen in the Register App.
Loyalty Member Lookup:
After adding the items to the order, Cashier can look up the member by clicking on the “Loyalty Discount” button
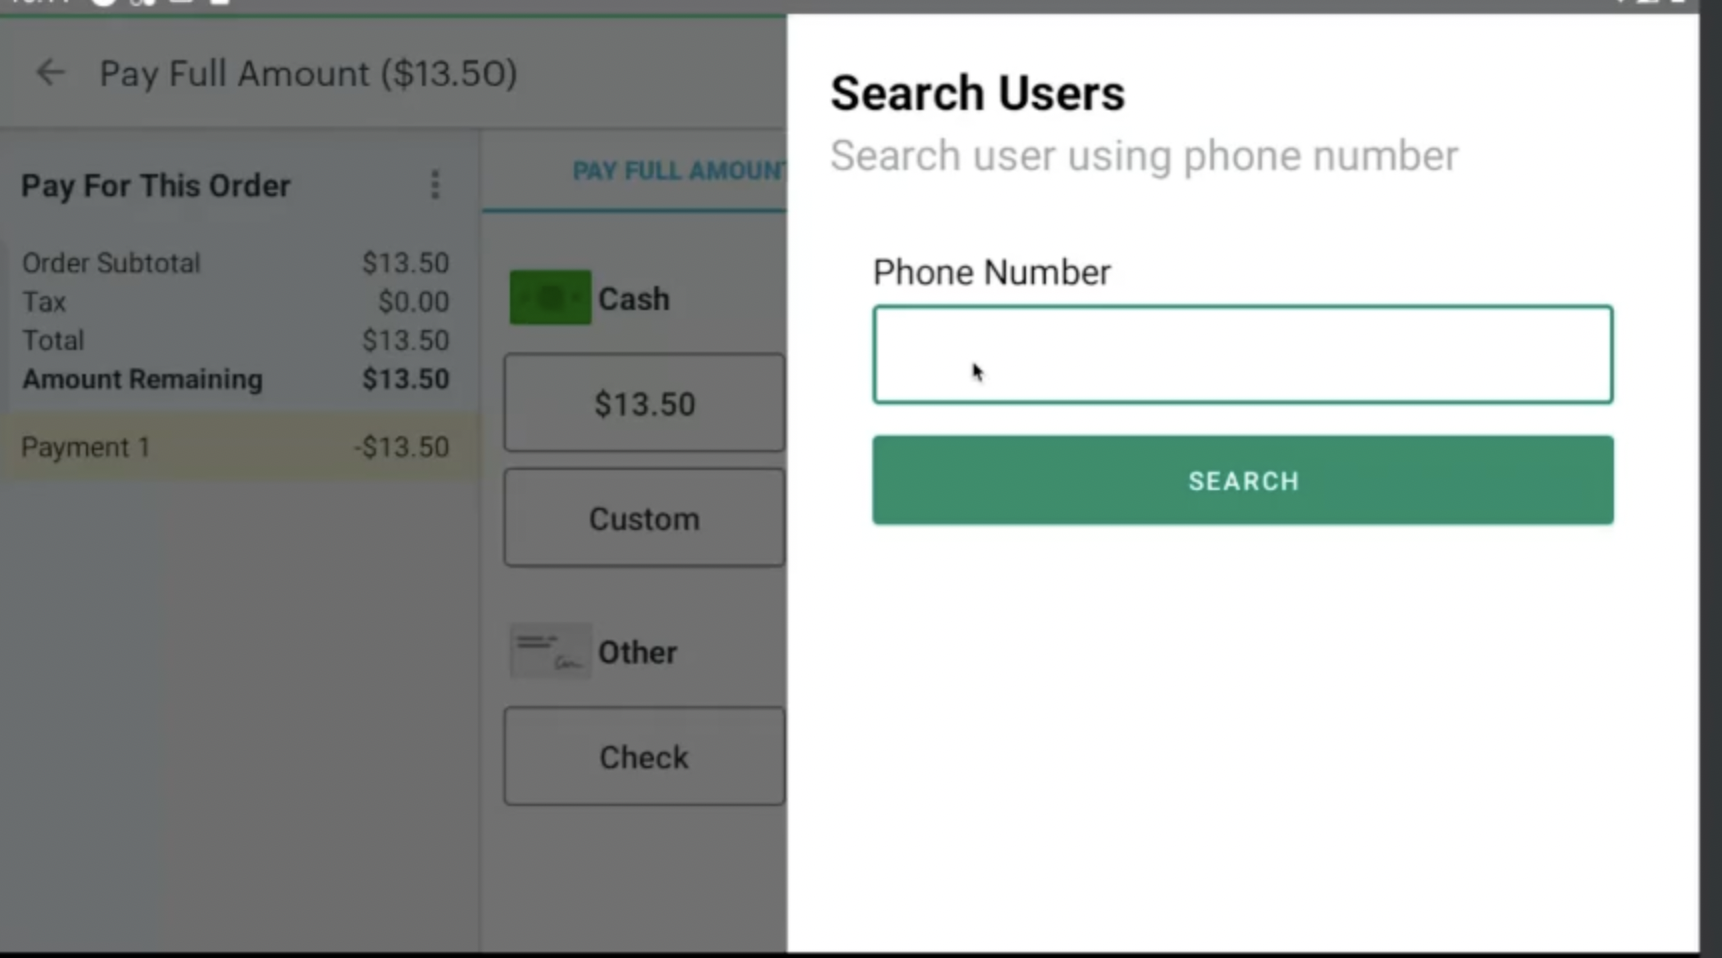
Applying a reward:
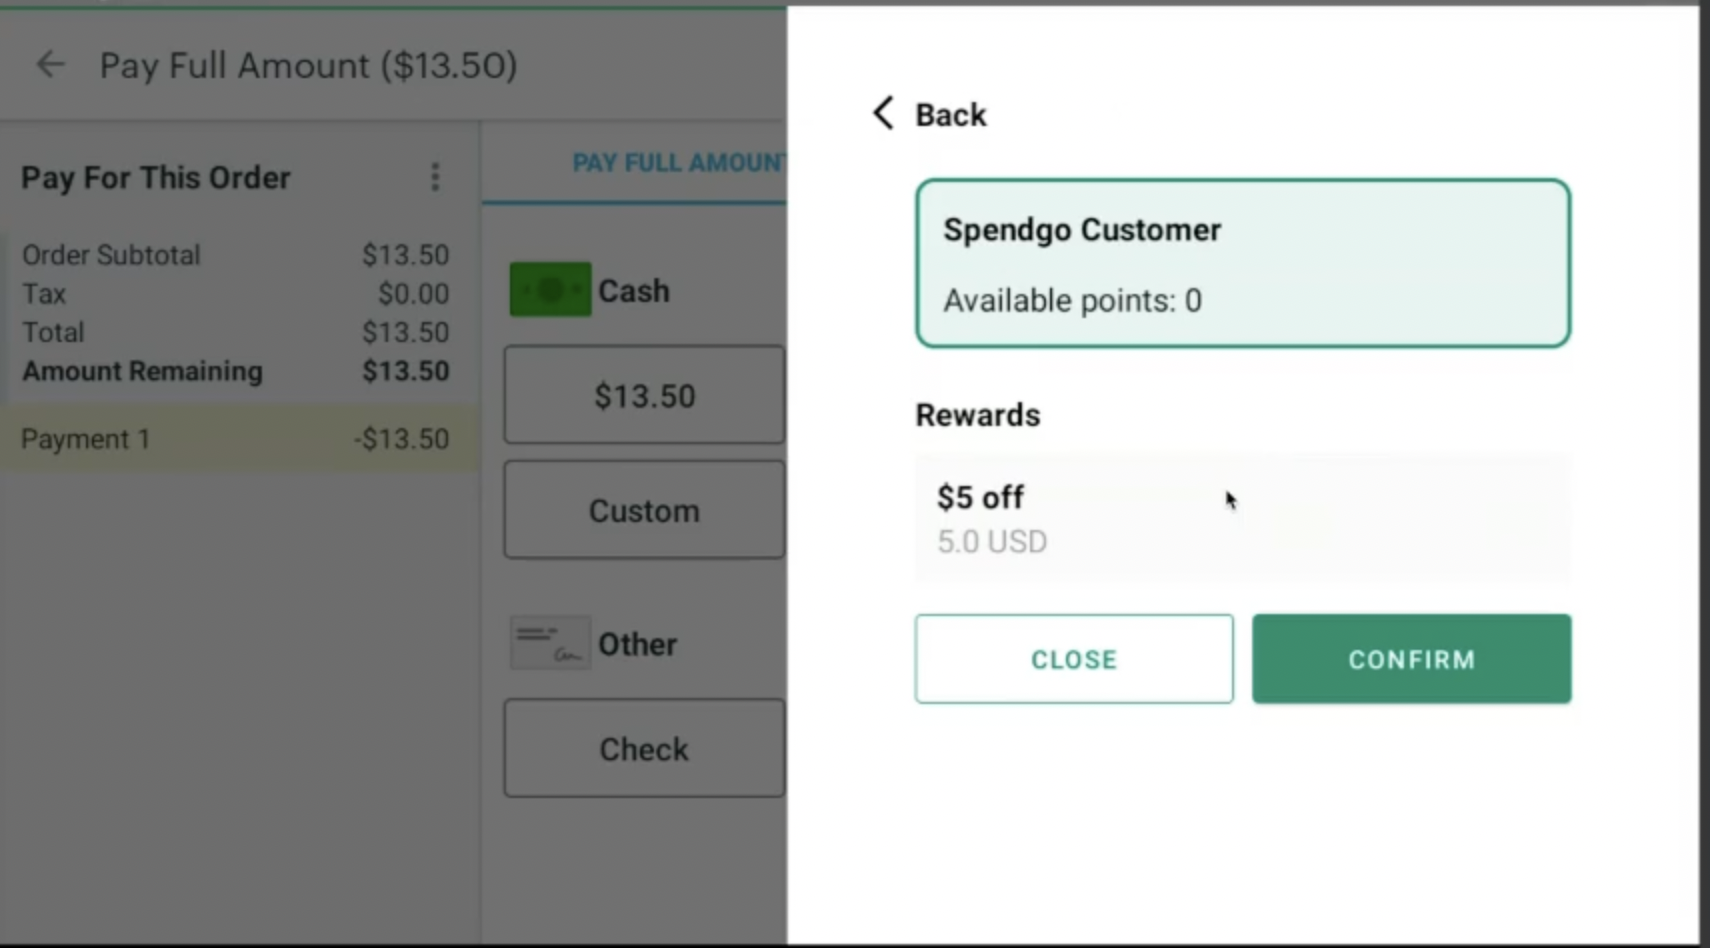
After the member lookup, the available rewards are listed for selection.
To proceed without redeeming any reward click on “CLOSE”.
To redeem the reward, cashier selects from the available rewards list and clicks on “CONFIRM”.
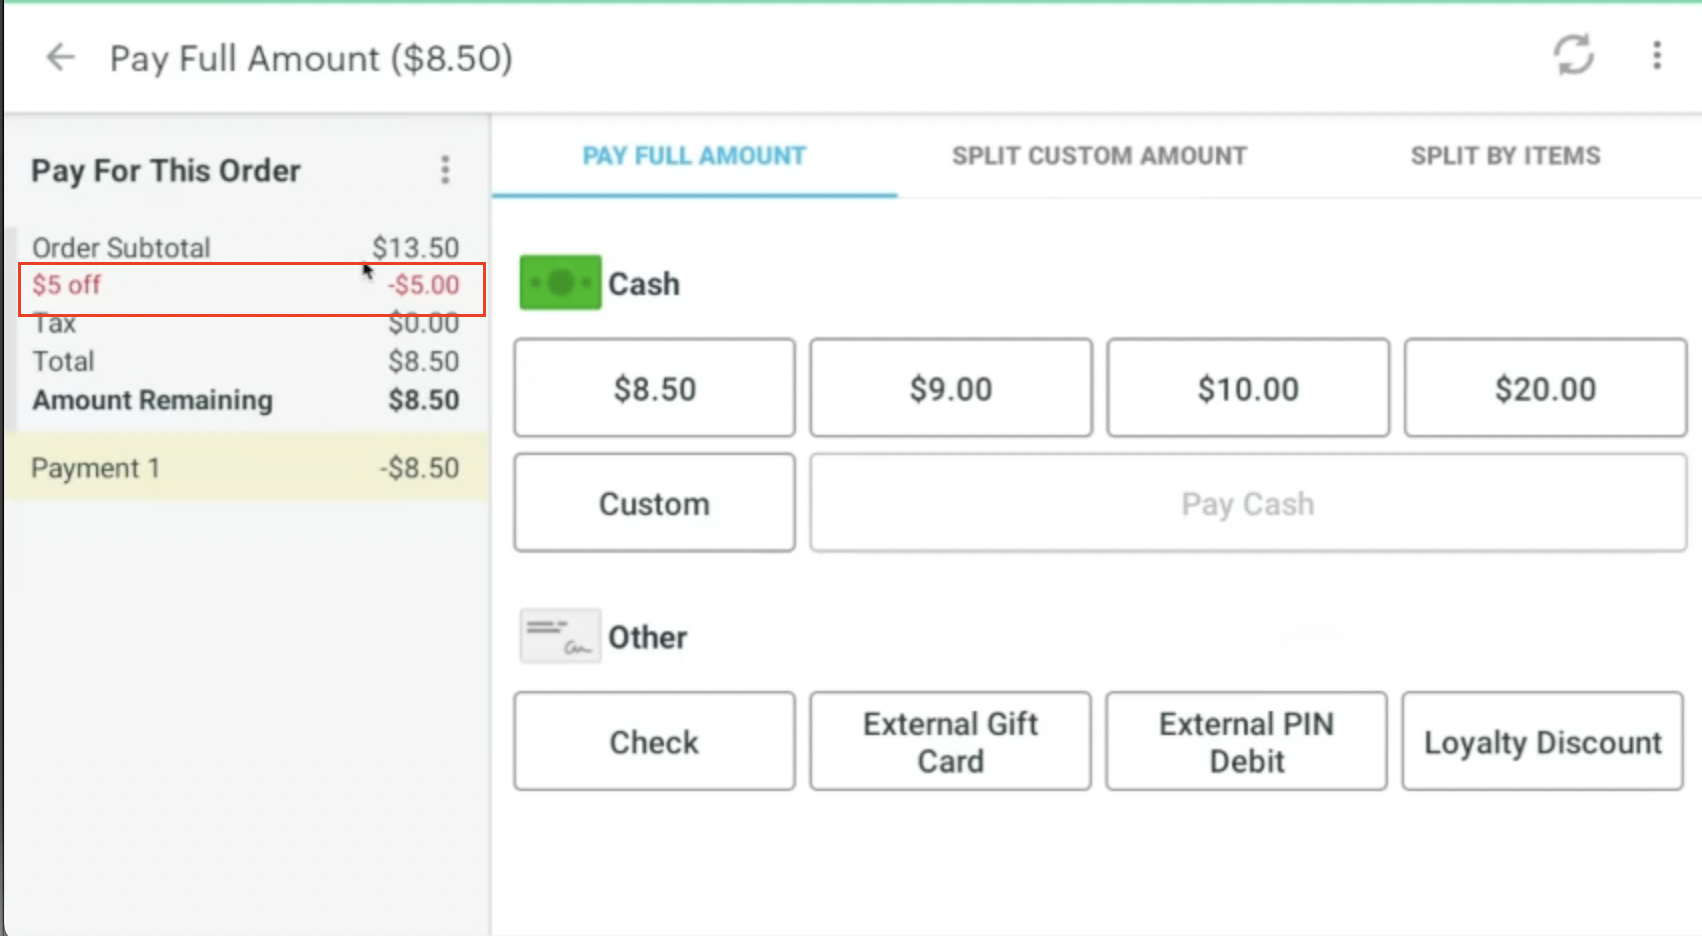
After clicking “CONFIRM” the check is updated to show the discount applied.
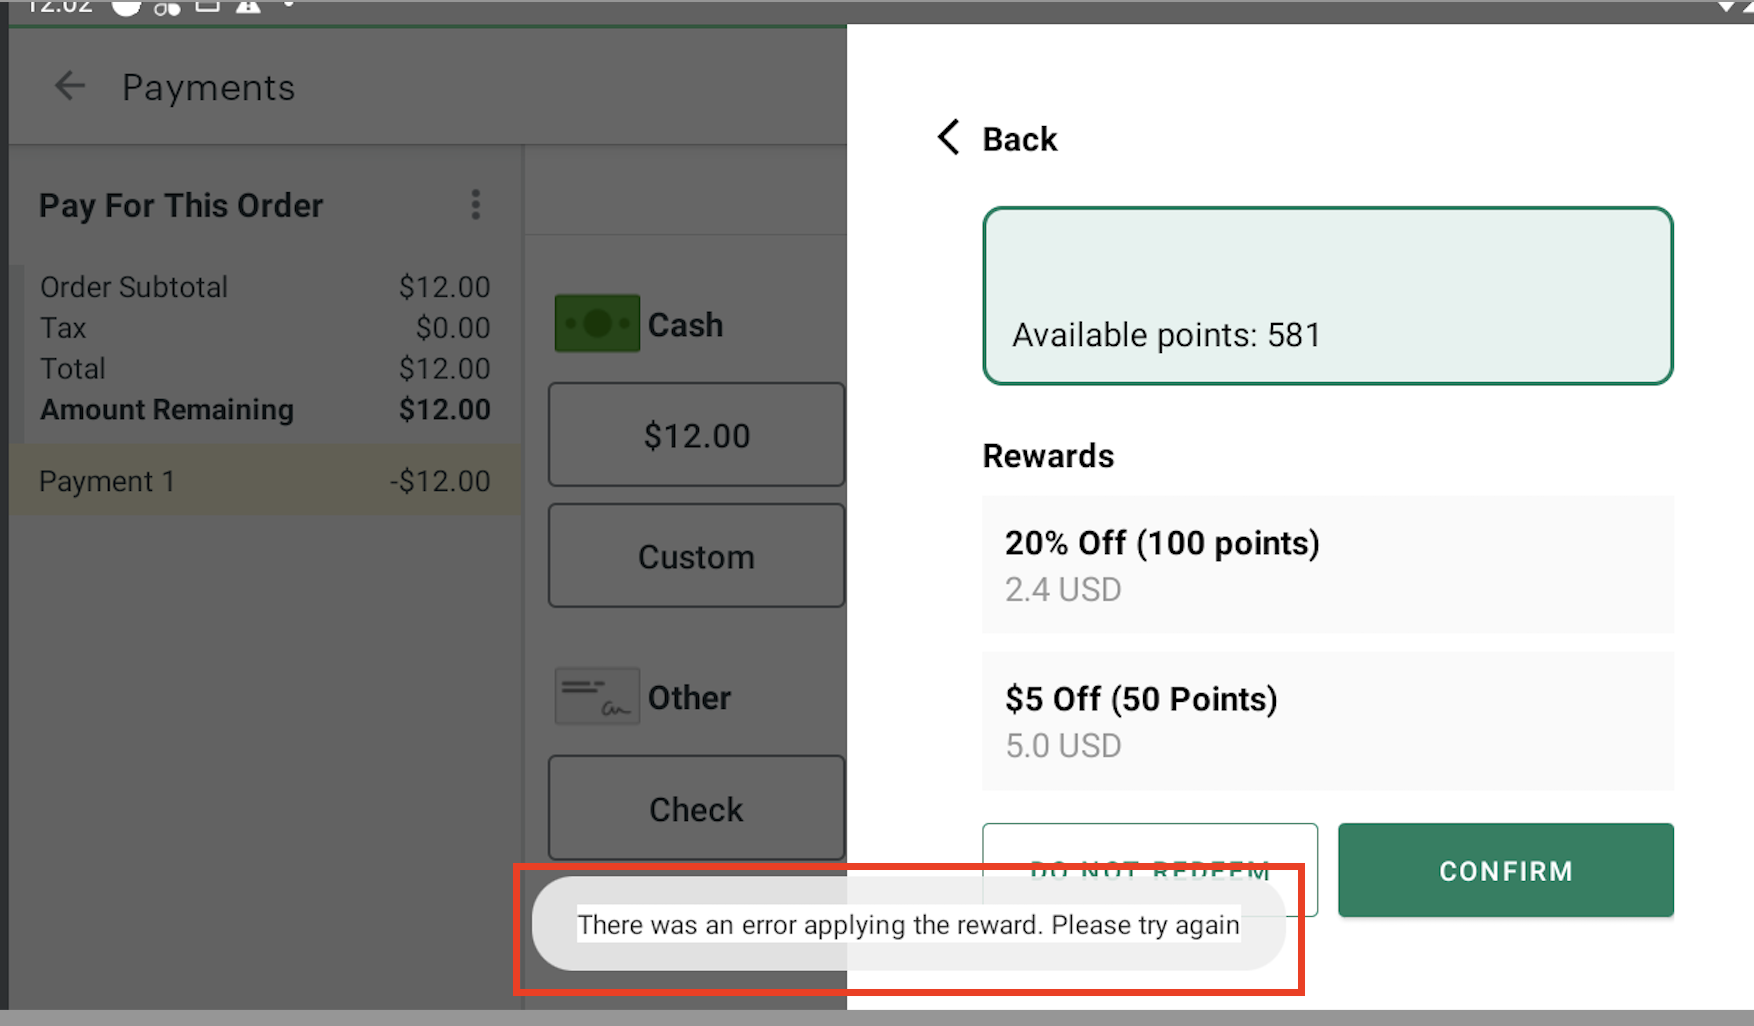
Please note that, only the rewards applicable to the order is listed after the lookup. However, the rewards is revalidated again when applied. Though it is highly unlikely if for whatever reason the reward fails to apply an error is displayed.
Updating the check after applying the reward:
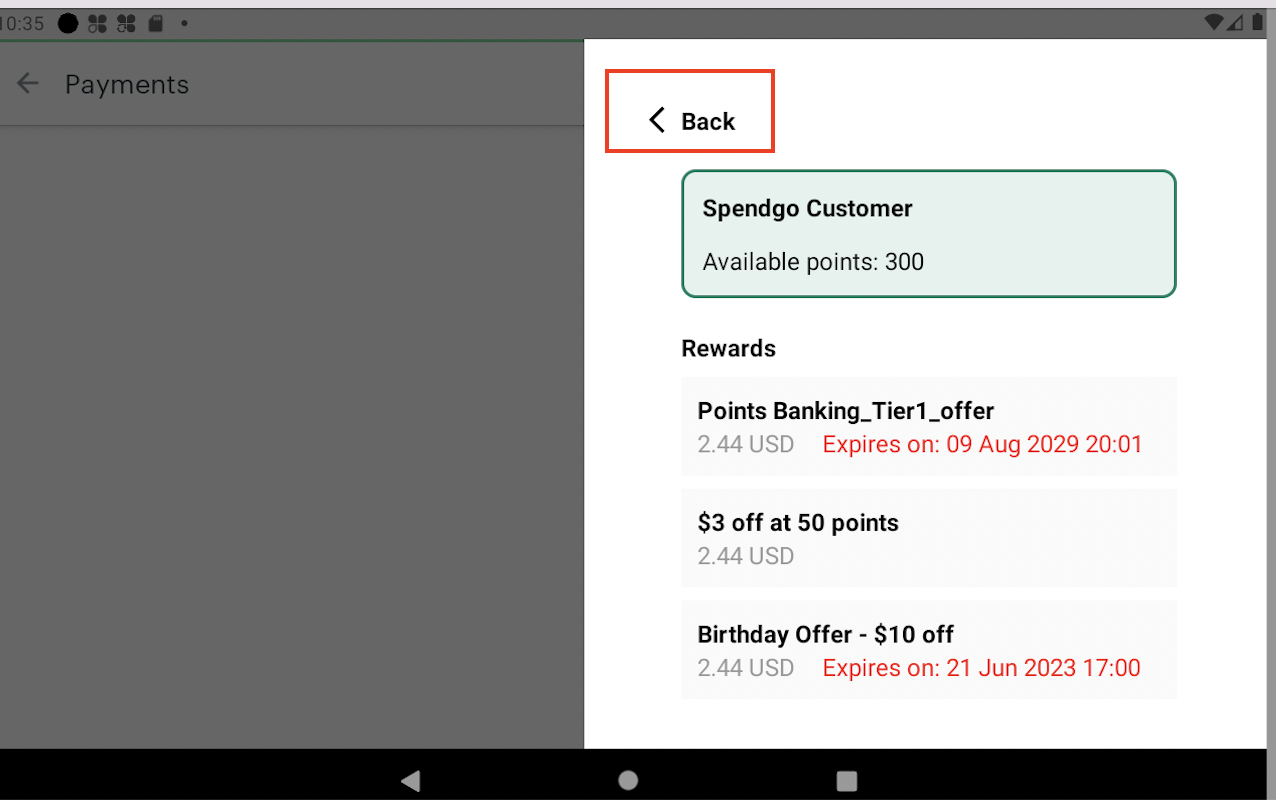
Click on the “Back” arrow to go back to go back and edit the check. New Item can be added or deleted , quantity modified or modifier changed.
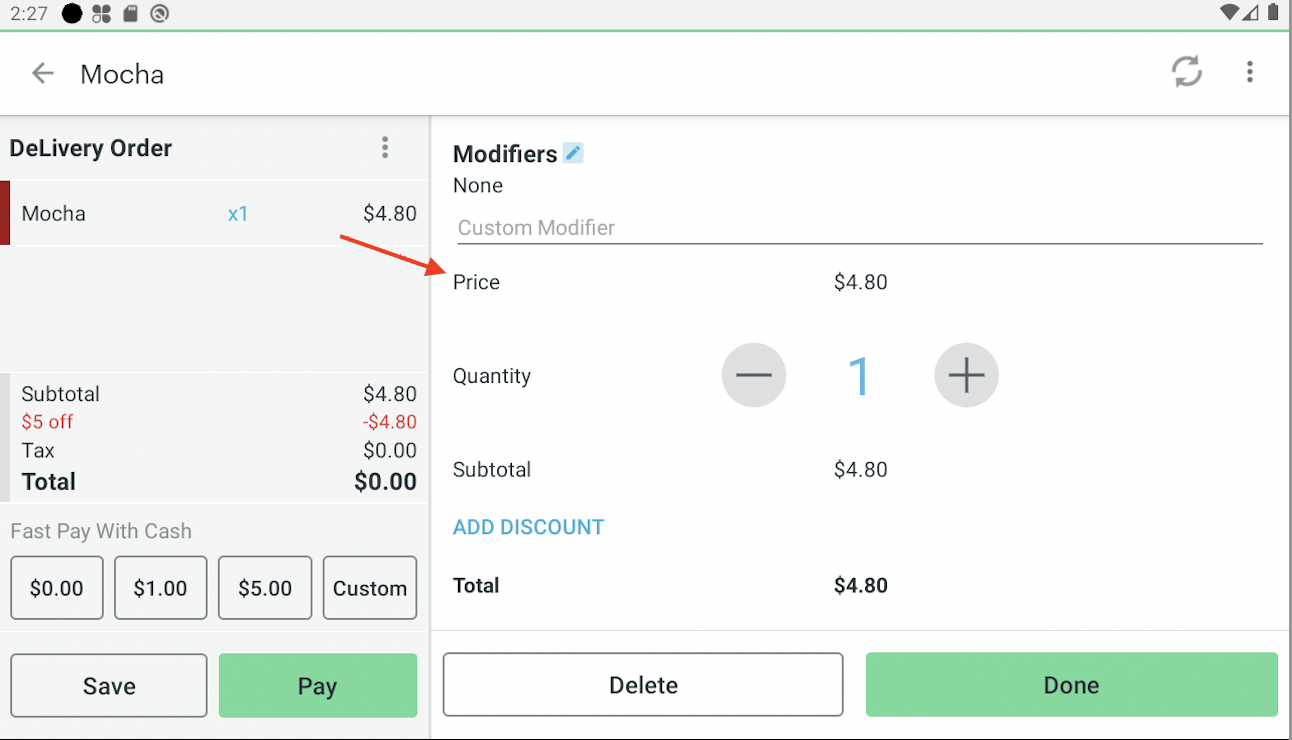
If the check is updated, then the applied reward is taken off from the check. Reward will have to be reviewed and reapplied by click on the “Loyalty Discount” button on the checkout screen.
Changing the applied reward:
To change the applied reward, click on the “Loyalty Discount” again and switch the reward.
Switching the Loyalty Member after the lookup:
After looking up a number, if it needs to be changed, click on the “Back” button, change the phone number and lookup again.
Processing Voids/Refunds:
Open the completed orders and double click on the order
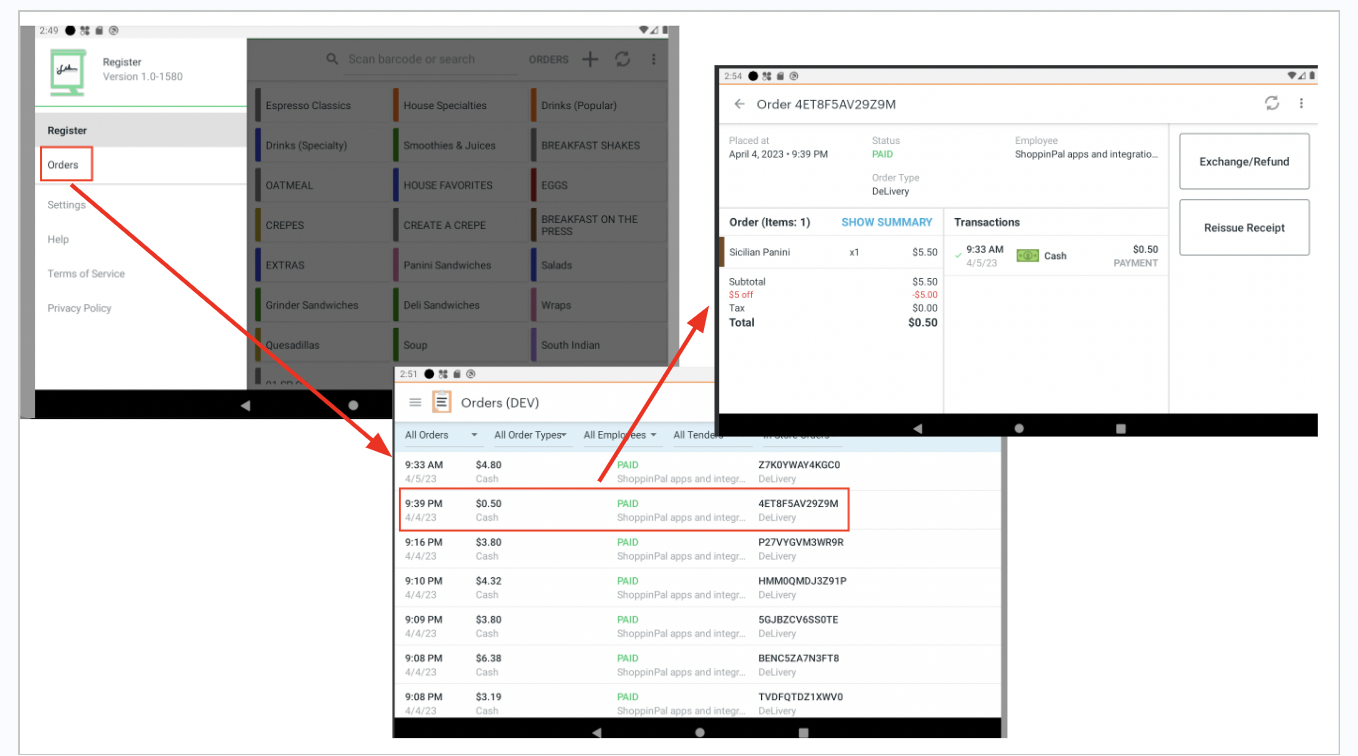
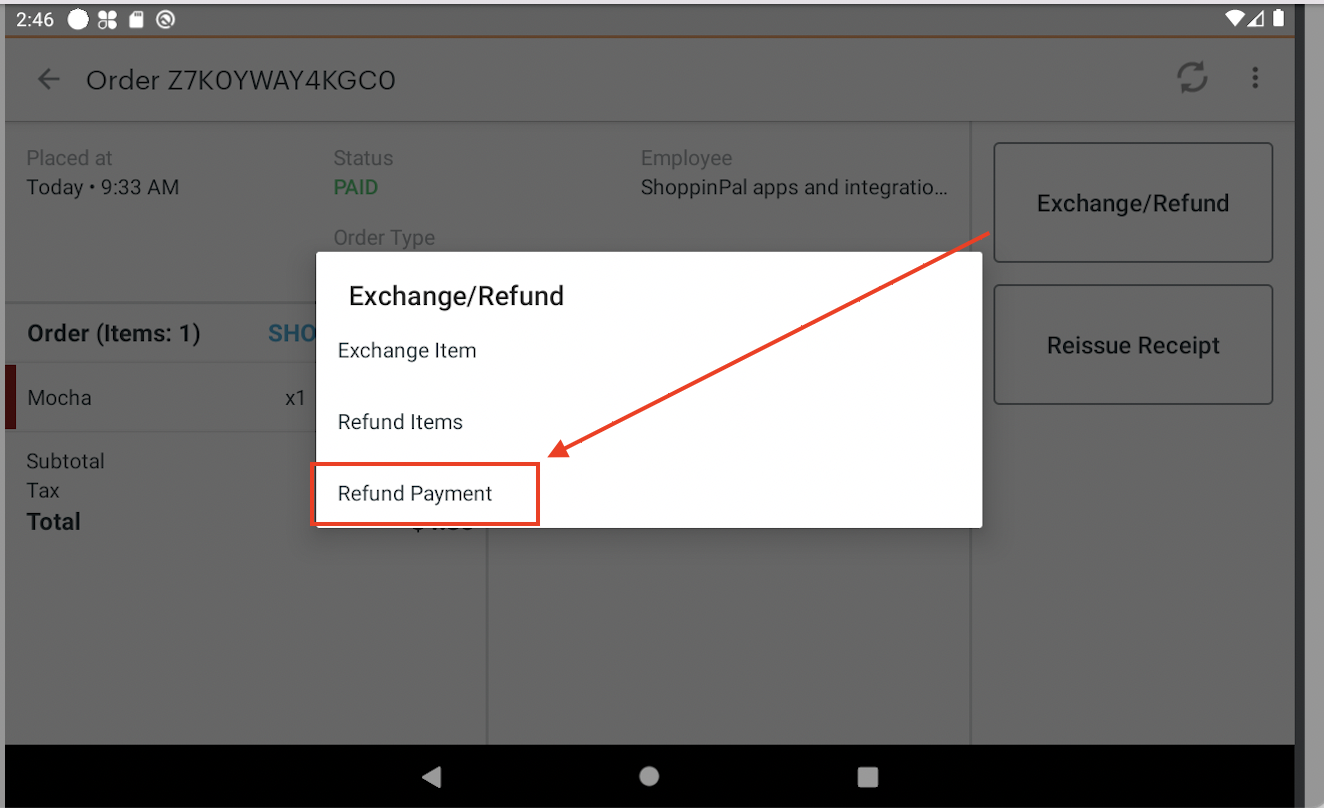
Click on “Exchange/Refund” and then select “Exchange/Refund”
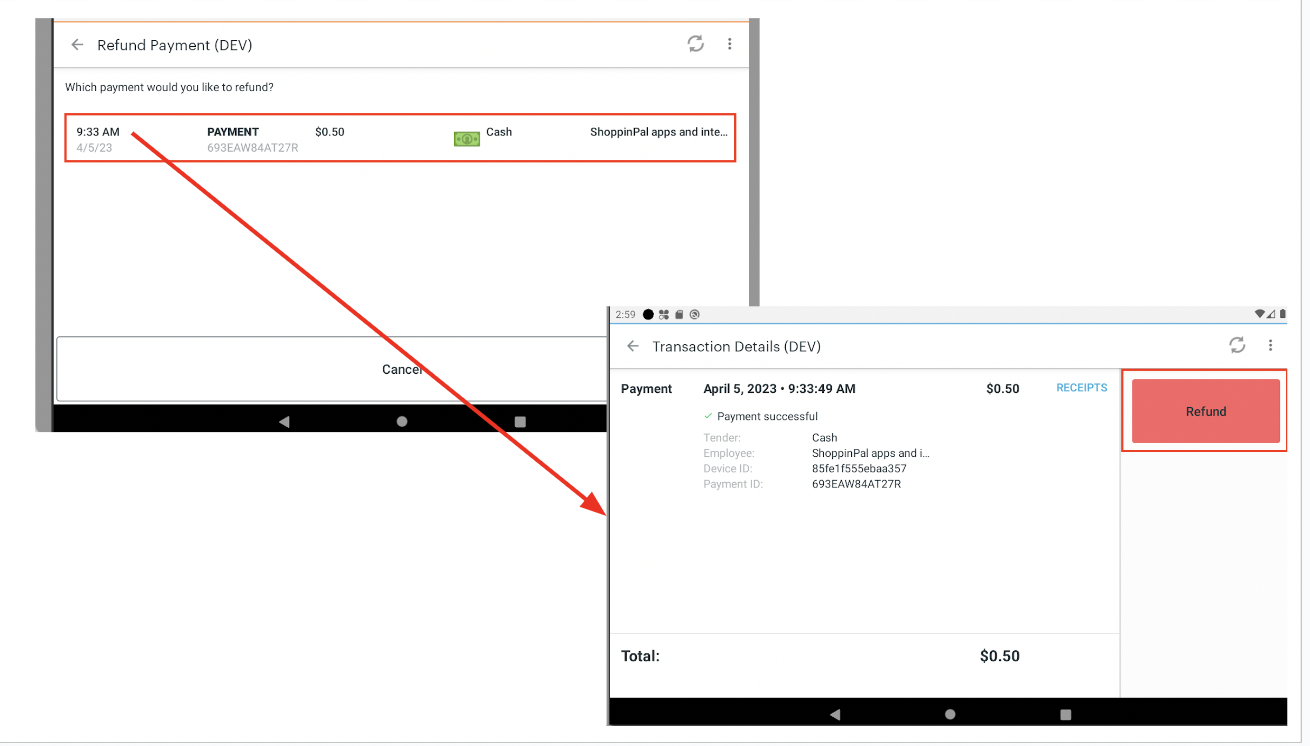
Double click and open the payment and click “Refund”
Please note that using this menu, the checks can also be updated using “Exchange Items” and “Refund Items” options. We do not support Partial Refunds. So, “Exchange items” and “Refund Items” are treated the same way the “Refund Payment” - i.e. we reverse any points accrued and reward redeemed on the order.
