Manage Stores
If you maintain a single or multiple stores for your account, you can manage them all from within your Settings.
Things to Know
You must be an Admin or Marketing Manager user to have permissions to create and edit stores. Other users can only view the store details they have permissions to view. If you don’t see one of your stores in your list, please contact your Admin user for store access.
It's important to ensure that your store settings match those of your partner if you have integrations with your Point of Sale (POS), E-commerce, or marketing platforms. Specifically, store IDs need to be exactly matched for these integrations to work. If you make changes to your store IDs, you must also update the mapping in your Partner Provider's platform to maintain proper functionality.
Stores cannot be deleted; this preserves any transaction data or member’s favorite store data associated with the store. Mark the store with a “Closed” status for any stores no longer open. Closed stores are not available in your Insights or in new Campaign creations.
Updates to stores do not get synced to your marketing integrations. Since marketing integrations sync only member data, any favorite store settings previously sent to the Partner will not be udpated until the member performs an update to their profile.
When opening a Downloaded CSV Report file of your stores from the Dashboard in Excel, it's often better to import the data rather than directly opening the file. This allows you to specify the correct encoding (UTF-8) and delimiter settings.
Create a Store
Creating a new store does not automatically enable Spendgo at that store. Depending on your integrations there may be additional steps to start using Spendgo at your new store location. Please contact your Customer Success Manager for next steps specific to your set up.
Navigate to Settings / Stores.
Click the + Add Store button to add a single store.
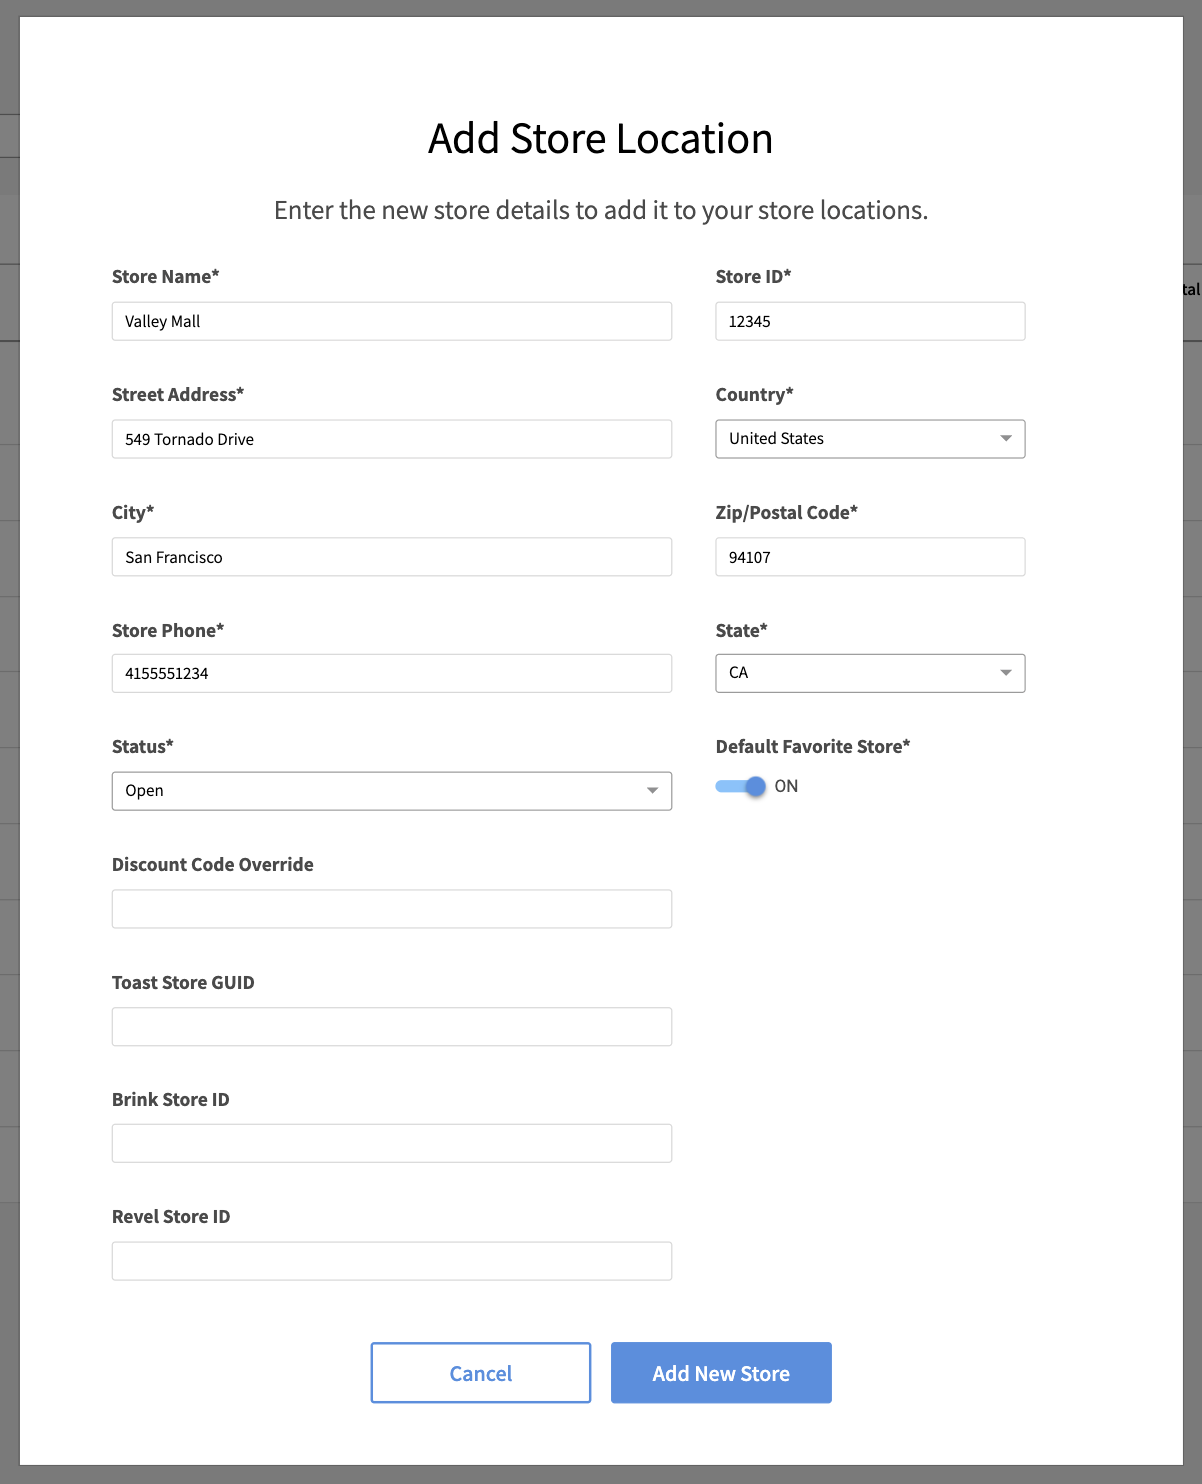
Enter all required settings for your store. See Store Settings for details.
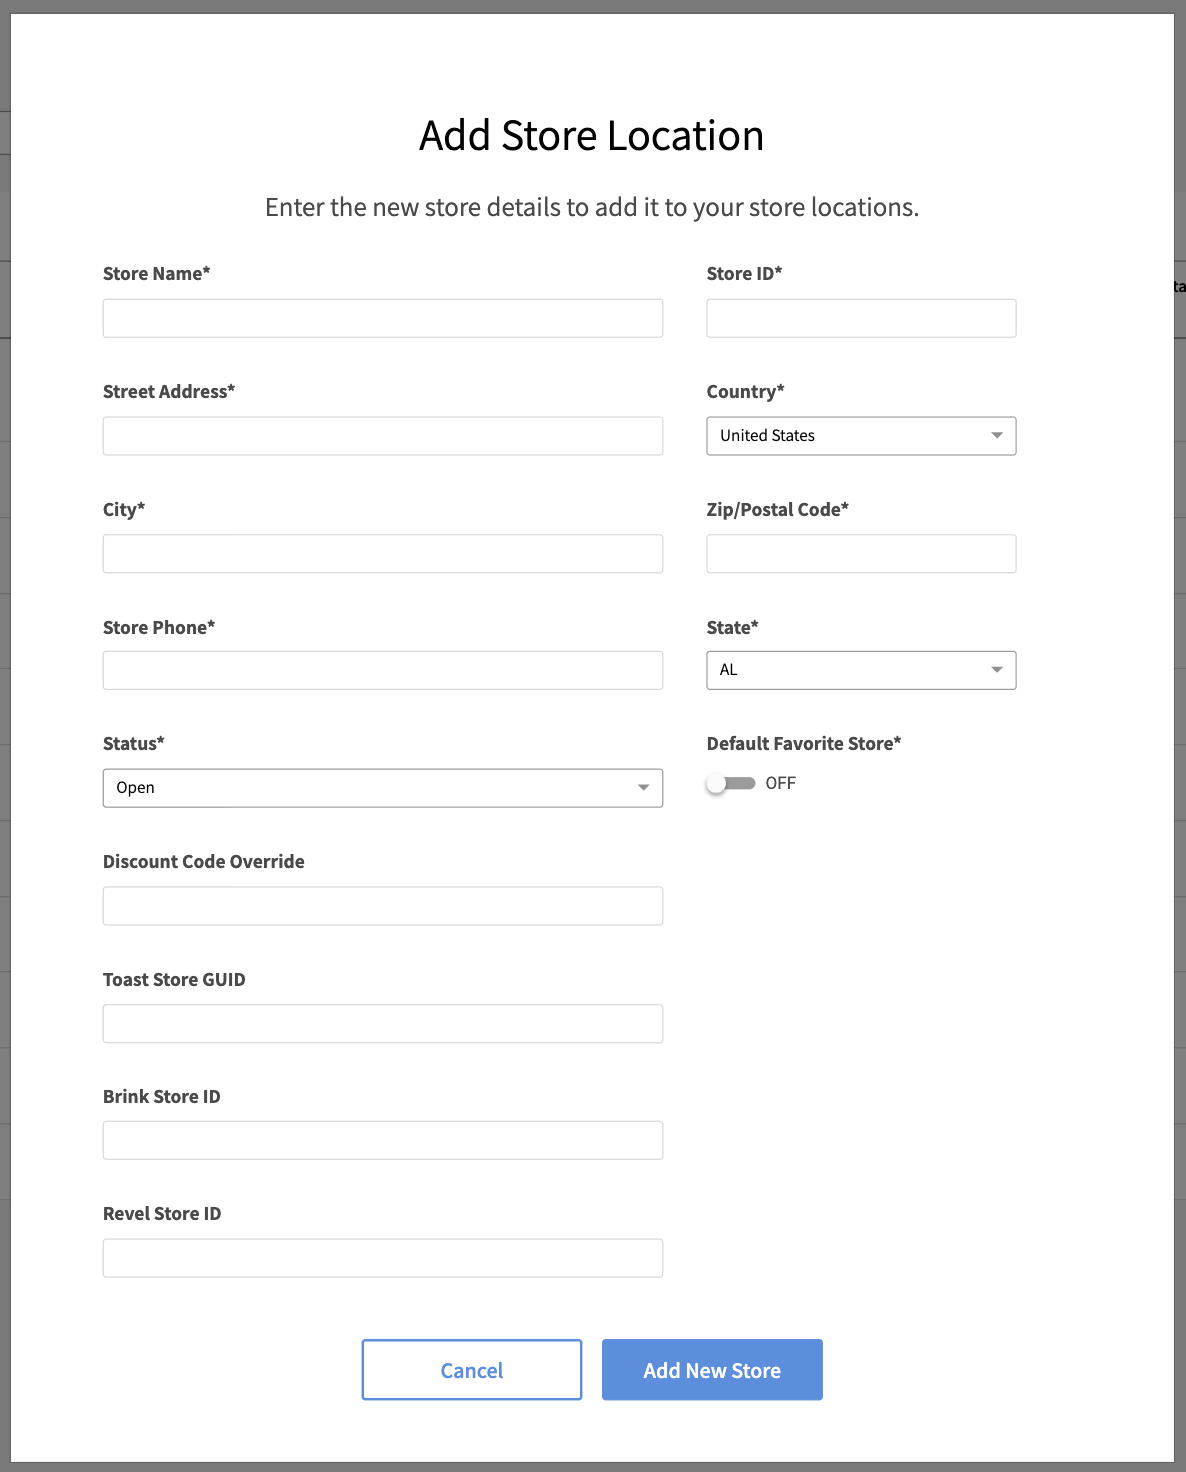
Click Add New Store.
Contact your Customer Success Manager to fully enable your store.
Download Stores
Navigate to Settings / Stores.
Click the Download CSV Report in the top right corner. The .zip file will download direct to your computer.
In reports, the Store ID is labeled as "store_no".
Edit a Store
You must be an Admin or Marketing Manager user to have permissions to edit stores.
It's important to ensure that your store settings match those of your partner if you have integrations with your Point of Sale (POS) or E-commerce sites. Specifically, store IDs need to be exactly matched for these integrations to work. If you make changes to your store IDs, you must also update the mapping in your Partner Provider's platform to maintain proper functionality.
Navigate to Settings / Stores.
In the store row you want to edit, click Manage / Edit
Enter your store changes. See Store Settings for details.
Click Save.
Import Stores
Import Store will add or update a list of stores. If your file contains a row with an existing Store ID in your account (found in column A store_no), this will update the store with the changes. All new Store IDs will be added as new stores.
It's important to your store settings match those of your partner if you have integrations with your Point of Sale (POS) or E-commerce sites. Specifically, store IDs need to be exactly matched for these integrations to work. If you make changes to your store IDs, you must also update the mapping in your Partner Provider's platform to maintain proper functionality.
Navigate to Settings / Stores.
Click the Import Stores button at the top right.

Upload your formatted CSV file containing your store list and Save Changes.
IMPORTANT: Your file must follow the Formatting Your File guidelines.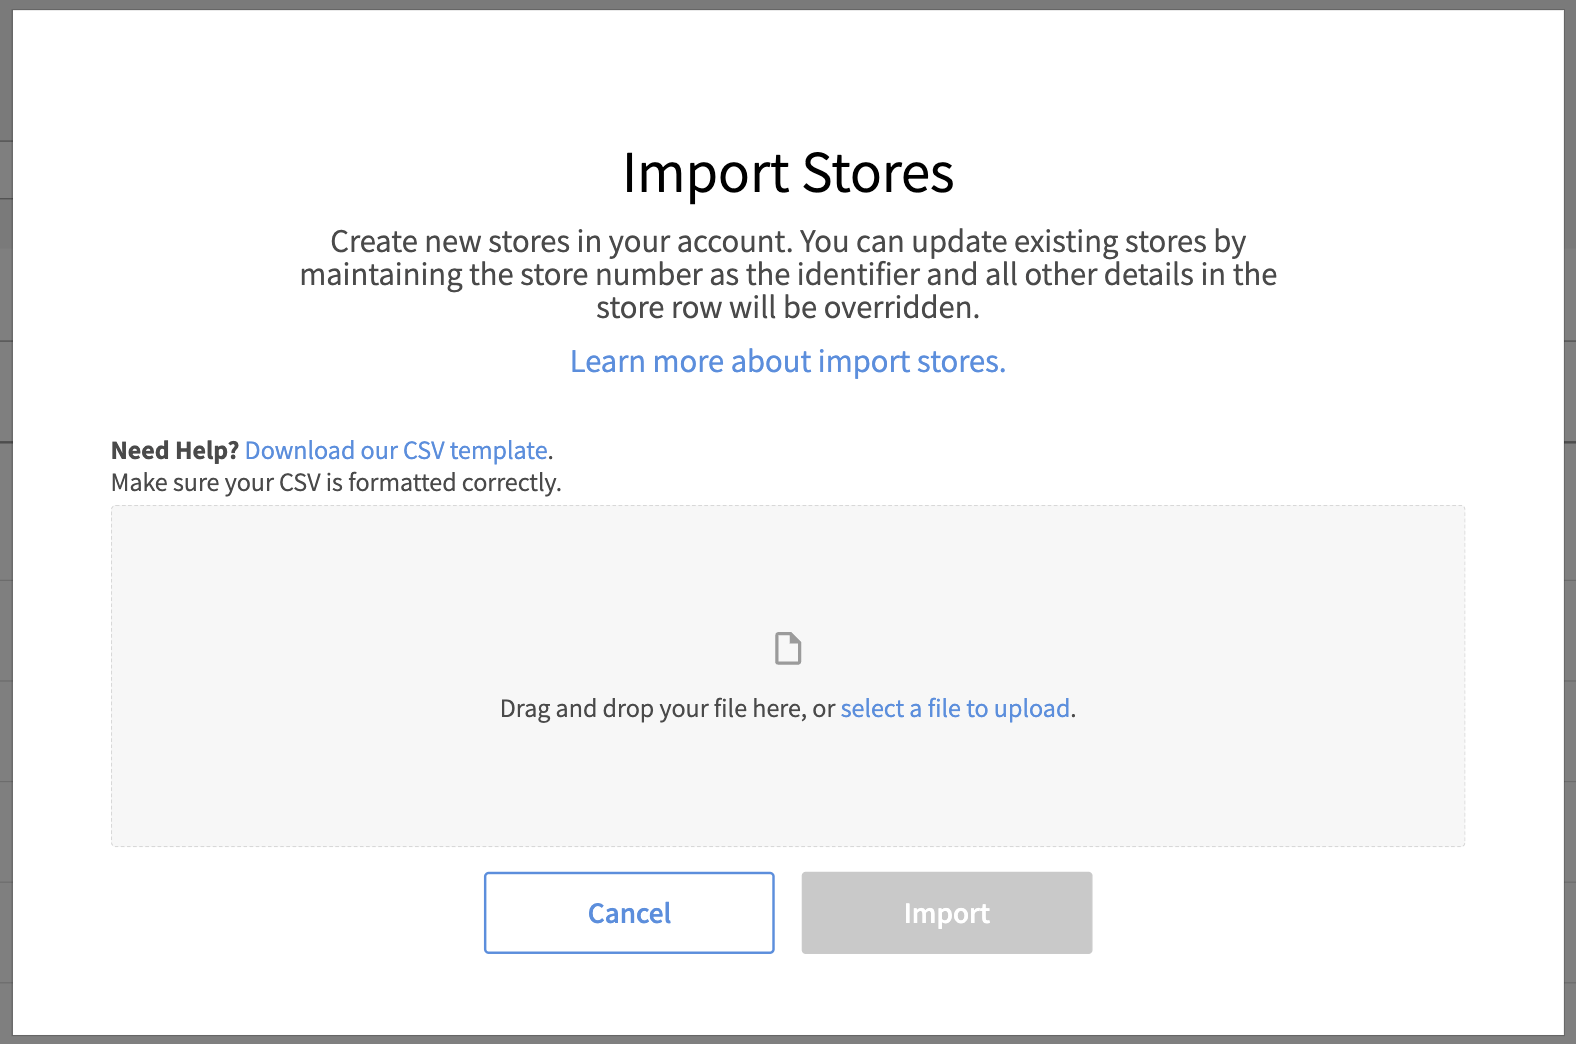
Formatting Your File
Saving your CSV file
Your file must be in a comma-separated value (CSV) format. We recommend saving as a UTF-8 file to preserve any special character formatting. Be cautious when saving CSV files from Excel, as it may change the encoding to a non-UTF-8 format. If possible, use "Save As" and explicitly choose "CSV UTF-8 (Comma delimited) (*.csv)".
Ensure your files do not include any duplicates. The Store ID must be unique.
Please follow these file formatting header rules before uploading your file:
Headers should always be present. The column headers are:
store_no — Required Store ID is a way to uniquely identify your stores. It is also used for most loyalty integrations which handle your member’s orders. There are some partner integrations which have its own store id type which have their own separate input (e.g. Brink, Toast, and Qu).
store_name — Required Store Name is a user-friendly way to identify your stores. We recommend all your store names be unique; store names are visible to members within their Member Portal activity feed to identify the location of their activity.
import_store — Required value is always “yes” to import the row.
store_status — Required store Status is always “Open” to import the row.
Open — for a live and open store.
Note, once the stores have been imported, you can individually update the store statuses to:Active Hidden — Use for a store you want to show in the insights but not to members. This is often used for lab testing environments.
Closed — Use for ermanently closed stores. You cannot target campaigns and view insights for ”Closed” stores.
Inactive — Use for stores that are temporarily closed and has a planned reopening. You cannot target campaigns and view insights for and “Inactive” stores.
street_address_line1 — Required address line 1 the store is located.
street_address_line2 — Optional address line 2 the store is located.
city — Required store city.
state — Required state or province the store is located
zip — Required zip/postal code the store is located.
country — Required country the store is located. Values supported are “United States” and “Canada”.
phone_number — Optional store’s phone number.
mt_opening — Optional Monday - Thursday store opening hour.
mt_closing — Optional Monday - Thursday store closing hour.
fri_opening — Optional Friday store opening hour.
fri_closing — Optional Friday store closing hour.
sat_opening — Optional Saturday store opening hour.
sat_closing — Optional Saturday store closing hour.
sun_opening — Optional Sunday store opening hour.
sun_closing — Optional Sunday store closing hour.
toast_location_guid — Optional Toast Store GUID setting. Only to be used if you have a Toast integration at this store location.
qu_location_id — Optional Qu Store Id setting. Only to be used if you have a Qu integration at this store location.
brink_location_token — Optional Brink Location Token setting. Only to be used if you have a Revel integration at this store location.
revel_store_id — Optional Revel Store Id setting. Only to be used if you have a Revel integration at this store location.
store_discount_code_override — When the "Discount Code Override" is configured for a store, it becomes the primary discount code used for redeeming offers at that store, taking precedence over any other default codes that may have been set. When left blank, the default codes set on the campaign will be used to redeem the offer at your store. Only one (1) Discount Code Override can be set per store.
is_default_favorite_store — The Default Favorite Store is set to Member’s who may not have selected a favorite store during their sign up. This allows members to be associated with a store for marketing and reporting purposes. Only one (1) store per account can be enabled as the Default Favorite Store. See Setting My Default Favorite Store.