Manage Item Groups
You can manage your Item Groups to define which items qualify for an offer and which items members can receive as rewards. Explore this article to learn how Item Groups work and how to configure them for your offers.
If you want to create item based offers, they require an Item Group. In this section you’ll learn to:
Create an Item Group
Before you create your Item Group, identify your campaign objective and review the formatting guidelines.
Go to Campaigns / Item Groups.
Click the add add ➕ icon to create a new Item Group.
Give your Item Group a unique name.
Note, exclude forward slashes (/) in your Item Group name to prevent errors.Drag and drop or upload your CSV file containing your group of items.
IMPORTANT: Your file must follow the formatting guidelines.Click Save to create your Item Group.
Upload/Overwrite an Item Group
Upload your Item Group will overwrite all its contents. This is recommended for any modifications — such as an add, remove, and/or edit item(s).
Before you get started
Follow the Item Group file formatting guidelines before uploading any files.
Saving your CSV file
Your file must be in a comma-separated value (CSV) format. We recommend saving as a UTF-8 file to preserve any special character formatting. Be cautious when saving CSV files from Excel, as it may change the encoding to a non-UTF-8 format. If possible, use "Save As" and explicitly choose "CSV UTF-8 (Comma delimited) (*.csv)".
Ensure your files do not include any duplicates.
You can download a list of your inventory items by going to Insights / Export Data and generating a Inventory List report. You can use this as a reference for what items have been loaded to your Loyalty system to date. When opening a Downloaded CSV Report file of your Items from the Dashboard in Excel, it's often better to import the data rather than directly opening the file. This allows you to specify the correct encoding (UTF-8) and delimiter settings.
Formatting Guidelines
Download Item Group CSV Template
Please follow these file formatting header rules before uploading your file:
The headers should always be present. The column headers are:
item: The Item Label (unique human-readable name) or Item ID (unique identifier) is a minimum requirement.
During the onboarding process of your loyalty program, you will decide whether to use Item IDs or Item Labels as the unique identifiers for earning rules and offer qualification. Once selected, you must consistently use the same option when setting up Item Groups and Item Qualifiers. If in your system you have an Item ID associated with multiple Item Labels, we recommend using unique Item Labels as the identifier. If you use the Item ID, it will qualify all items associated with that Item ID.
If there is variability in how an item is identified across your POS systems, you’ll need to include every version from all your systems. Use the exact naming that is used.
Item Labels may contain leading or trailing spaces. Please ensure they are properly formatted to match your system.
quantity: Specifies how many items from the Item Group must be present in the basket to qualify for or redeem an offer. This value does not require multiple units of the exact item listed in the row—any combination of items within the group can contribute toward meeting the quantity. All rows within the same Item Group must use the same quantity value.
See Example Offers & Item Groups for how to use the “quantity” value. The following are the offer types which support quantities greater than one (1):Discount ( $ )
Discount ( % )
Free Item
Price Adjustment
The item-based offer types BOGO and Multiply Points only support a quantity value of 1. These offer types do not operate for any quantity other than 1.
price_adjustment: Is required for a Price Adjustment offer type. Otherwise, leave blank. Learn more about Price Adjustment offer types. The “price_adjustment” should be the same value for all items listed in the Item Group. See Example Offers & Item Groups for how to use the “price_adjustment” value.
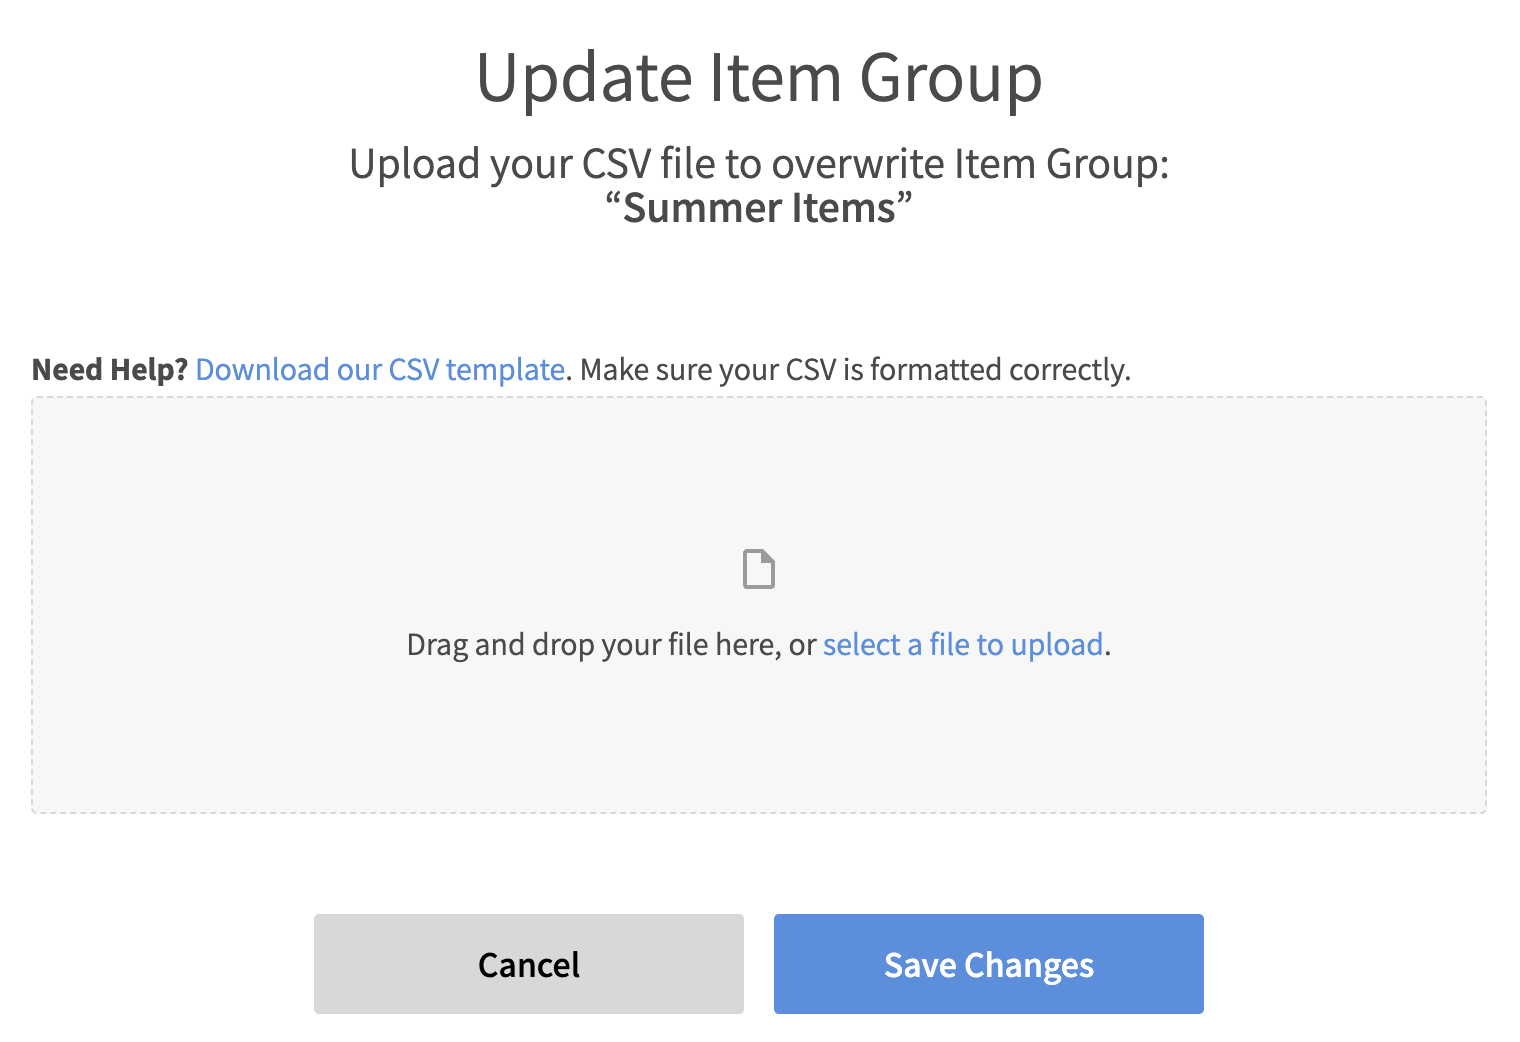
Go to Campaigns / Item Groups.
In the row of the Item Group, go to Manage / View.

Click the Upload :upload: icon.
Upload your properly formatted CSV file containing the your item settings and Save Changes.
View/Edit Items
Go to Campaigns / Item Groups.
You will see a list of all your Item Groups. In the row of the Item Group, go to Manage / View to view all the Items within a specific Item Group.
To edit an item, click on the pencil :edit: icon next to the Item Label, Quantity or Price Adjustment to edit the entry.
Note: you can only edit one value at a time.Enter your updated Item Label, Quantity or Price Adjustment value and click the check mark icon to save. Click the ✖️ icon to discard your changes.
Add an Item
Go to Campaigns / Item Groups.
In the row of the Item Group you wish to add an item to, navigate to Manage / View.
Click on the add ➕ icon to add a new item row.
Enter your Item details. A minimum of the Item column must be filled, either with the Item Label or Item ID.
Click the green check mark ✔️ to add your Item row. Click the red ✖️ to cancel the add.

Delete Item(s)
An Item Group must have at least 1 item. If you want to update all the items in a list, we recommend following the Upload/Overwrite an Item Group steps.
Go to Campaigns / Item Groups.
In the row of the Item Group, go to Manage / View.
Select the checkbox next to any item(s) you want to remove.
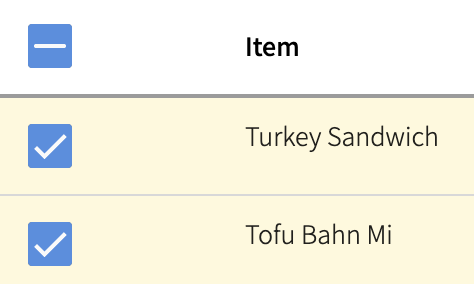
Click the Delete :delete: icon.
Confirm your deletion of selection item(s).
Download Item Group
Go to Campaigns / Item Groups.
In the row of the Item Group, go to Manage / View.
Click the Download :download: icon. The file will directly download to your device.